Sample Application
The OASEES Sample App demonstrates how containerized applications work within the OASEES ecosystem.
Overview
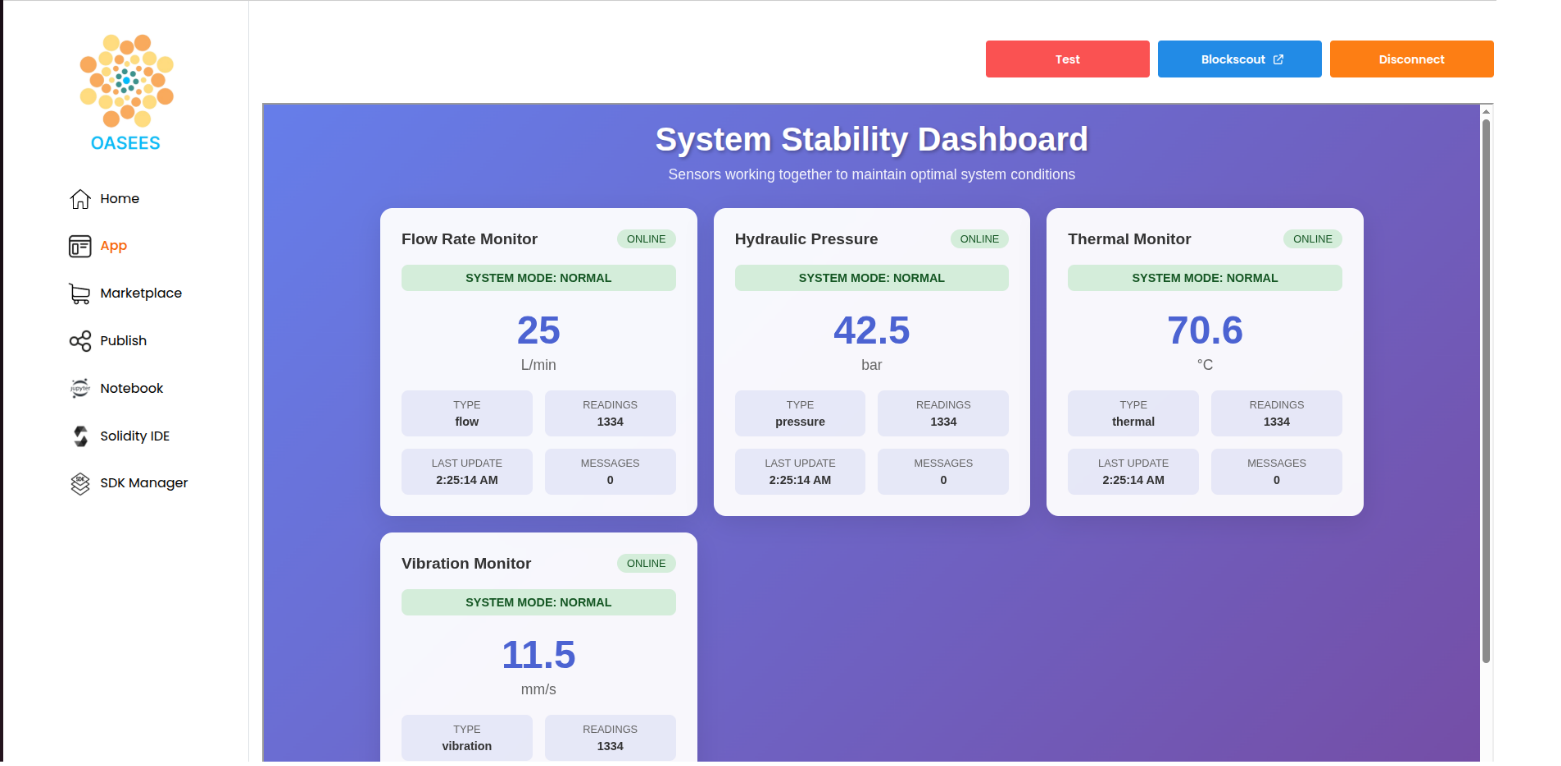
The sample application is a containerized sensor monitoring system that demonstrates:
- Dashboard with real-time sensor readings
- Multiple sensor containers exposing metrics endpoints
- DAO-based action enforcement
- Inter-container messaging
If your application logic works with docker-compose, it will work when deployed from OASEES.
Application Components
Repository
The sample app is available at: https://github.com/oasees/Oasees-Sample-app
Main Components
- Dashboard: Shows current sensor readings (visible in the OASEES portal)
- Sensor Containers: Expose synthetic metrics on HTTP endpoints
- Action Logic: Implements responses to DAO-enforced actions
- Messaging System: Enables inter-container communication
The application logic is use-case specific. This application demonstrates basic but functional patterns.
Metrics Endpoint
Each sensor exposes metrics at /metrics. Example from sensor_app.py (line 144):
@app.route('/metrics')
def metrics():
    """Main metrics endpoint"""
    current_value = get_current_value()
    return jsonify({
        'sensor_name': SENSOR_NAME,
        'sensor_type': SENSOR_TYPE,
        SENSOR_TYPE+'_value': current_value,
        'unit': get_unit(),
        'readings_count': sensor_data['readings_count'],
        'status': sensor_data['status'],
        'forced_metrics': force_metrics['active'],
        'system_mode': system_mode,
        'messages_received': len(received_messages)
    })
Any integer or float field will be considered a metric by the collector. Avoid alphanumeric strings that change (like timestamps), as this will cause collector issues.
Action Endpoint
The /send_message endpoint receives actions from the DAO (line 237):
@app.route('/send_message', methods=['POST'])
def send_message():
    """Send a message to containers to coordinate system stability"""
    try:
        data = request.get_json()
        target_sensors = data.get('target_sensors', [])
        action = data.get('action', 'stabilize')
        duration = data.get('duration', 30)

        # Send message to each target container
        for container_name in target_sensors:
            message_payload = {
                'from': SENSOR_NAME,
                'from_type': SENSOR_TYPE,
                'action': action,
                'timestamp': datetime.now().isoformat()
            }

            response = requests.post(
                f"http://{container_name}:5000/receive_message",
                json=message_payload,
                timeout=5
            )
        # ... additional logic
    except Exception as e:
        return jsonify({'error': str(e)}), 500
Use-case specific: Your endpoint must exist to receive requests from the blockchain agent.
OASEES-Specific Labels
The docker-compose.yaml requires OASEES labels for proper scheduling:
Required Labels
oasees.device: Which device to schedule the container onoasees.expose: Which port to expose the container’s internal portoasees.ui: Set totruefor dashboard/UI onlyoasees.ui.port: Port for the dashboard/UI (required ifoasees.uiis true)oasees.sensor: Specify if the application uses camera, microphone, etc.
Example: OASEES docker-compose.yaml
version: '3.8'

services:
  dashboard:
    image: oasees/sample-app-ui
    ports:
      - "5000:5000"
    depends_on:
      - vibration-sensor
      - thermal-sensor
      - pressure-sensor
      - flow-sensor
    environment:
      - SENSORS=vibration-sensor:5000,thermal-sensor:5000,pressure-sensor:5000,flow-sensor:5000
    networks:
      - sensor-network
    labels:
      oasees.device: labpc
      oasees.expose: 31580
      oasees.ui: "true"
      oasees.ui.port: 31580

  vibration-sensor:
    image: oasees/sample-app-sensor
    environment:
      - SENSOR_TYPE=vibration
      - SENSOR_NAME=Vibration Monitor
      - PORT=5000
    ports:
      - "5000:5000"
    networks:
      - sensor-network
    labels:
      oasees.device: labpc
      oasees.expose: 32687

  thermal-sensor:
    image: oasees/sample-app-sensor
    environment:
      - SENSOR_TYPE=thermal
      - SENSOR_NAME=Thermal Monitor
      - PORT=5000
    ports:
      - "5000:5000"
    networks:
      - sensor-network
    labels:
      oasees.device: vm1
      oasees.expose: 32688

  # ... other sensors

networks:
  sensor-network:
    driver: bridge
Update
oasees.devicelabels to match your actual device names from the cluster.
Deploying the Sample App
1. Download and Modify
Download the docker-compose file and modify it for your setup. You must schedule at least:
- The dashboard on the master
- One sensor container on the master
- One sensor container on a worker device
2. Convert the Application
Convert the docker-compose file for OASEES:
oasees-sdk convert-app docker-compose_oasees.yaml my-app
This can also be done from the Jupyter notebook terminal in the portal (make sure oasees-sdk is installed in the notebook environment).
3. Deploy the Application
oasees-sdk deploy-app my-app
4. Check Deployment
See where each component is deployed:
oasees-sdk get-app
Example output:
=====================================================================
OASEES APP DEPLOYMENT SUMMARY
=====================================================================
Service: dashboard        | Port: 31580 | Node: intel-nuc
Service: flow-sensor      | Port: 32691 | Node: device4
Service: pressure-sensor  | Port: 32690 | Node: device3
Service: thermal-sensor   | Port: 32688 | Node: device2
Service: vibration-sensor | Port: 32687 | Node: device1
=====================================================================
5. Access the Dashboard
The application UI will be visible in the OASEES portal under the “App” section.
Application Notes
- UI/Dashboard: Must be dockerized and accessible
- External Components: If not fully dockerized, ensure UI can communicate with external components
- Networking: Kubernetes networking is simplified when devices are on the same premises
- Action Endpoints: Must be POST endpoints to receive DAO actions
- Localhost URLs: Endpoints can use
localhostsince agents run within Kubernetes